Table of Contents
What is Input Element?
- HTML <input> Element Fundamental Element है। इसका Use User से Input Data लेने के लिए Form Field बनाने के लिए किया जाता है।
- हम User से अलग-अलग Information Collect करने के लिए अलग-अलग Input Field Apply कर सकते हैं।
					<!DOCTYPE html>
<html lang="en">
<head>
    <title>Input Element</title>
    <link rel="icon" href="favicon.ico" type="image/x-icon" />
</head>
<body>
    <form action="action_page.php" method="post">
        Enter Your Text<br>
        <input type="text">
    </form>
</body>
</html>

Types of Input Element
Input Type Text
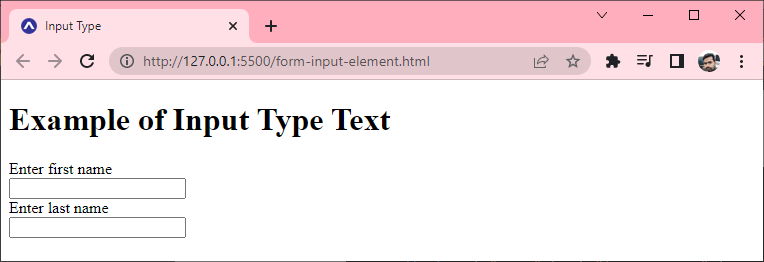
- Input Type Text का Use Single-line Input Text Field को Define करने के लिए किया जाता है।
					<!DOCTYPE html>
<html lang="en">
<head>
    <title>Input Type</title>
    <link rel="icon" href="favicon.ico" type="image/x-icon" />
</head>
<body>
    <h1>Example of Input Type Text</h1>
    <form action="action_page.php" method="post">
        <label>Enter first name</label><br>
        <input type="text" name="firstname"><br>
        <label>Enter last name</label><br>
        <input type="text" name="lastname">
    </form>
</body>
</html>
Input Type Password
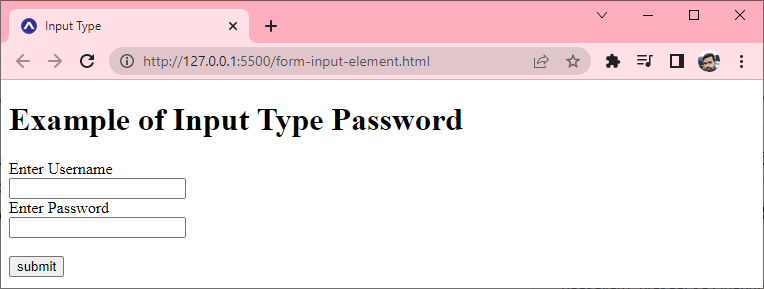
- Input Type Password एक Input Field बनाता है, जो User को Webpage में सुरक्षित रूप से Password Enter करने की अनुमति देता है।
- Fill किए गए Password में Enter Text को “*” या “।” में बदल दिया जाता है, ताकि इसे किसी अन्य User द्वारा पढ़ा न जा सके।
					<!DOCTYPE html>
<html lang="en">
<head>
    <title>Input Type</title>
    <link rel="icon" href="favicon.ico" type="image/x-icon">
</head>
<body>
    <h1>Example of Input Type Password</h1>
    <form action="action_page.php" method="post">
        <label>Enter Username</label><br>
        <input type="text" name="username"><br>
        <label>Enter Password</label><br>
        <input type="password" name="password"><br><br>
        <input type="submit" value="submit">
    </form>
</body>
</html>
Input Type Submit
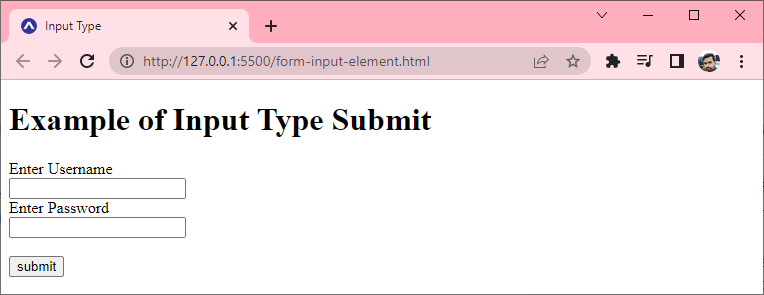
- Input Type Submit “Click” Event होने पर Server पर Form Submit करने के लिए Submit Button को Define करता है।
					<!DOCTYPE html>
<html lang="en">
<head>
    <title>Input Type</title>
    <link rel="icon" href="favicon.ico" type="image/x-icon">
</head>
<body>
    <h1>Example of Input Type Submit</h1>
    <form action="action_page.php" method="post">
        <label>Enter Username</label><br>
        <input type="text" name="username"><br>
        <label>Enter Password</label><br>
        <input type="password" name="password"><br><br>
        <input type="submit" value="submit">
    </form>
</body>
</html>
Input Type Reset
- Input Type Reset को एक बटन के रूप में भी Define किया गया है, लेकिन जब User एक Click Event करता है, तो यह Default रूप से सभी Input Values को Reset कर देता है।
					<!DOCTYPE html>
<html lang="en">
<head>
    <title>Input Type</title>
    <link rel="icon" href="favicon.ico" type="image/x-icon">
</head>
<body>
    <h1>Example of Input Type Reset</h1>
    <form action="action_page.php" method="post">
        <label>User id: </label>
        <input type="text" name="user-id" value="user">
        <label>Password: </label>
        <input type="password" name="pass" value="pass">
        <br><br>
        <input type="submit" value="login">
        <input type="reset" value="Reset">
    </form>
</body>
</html>

Input Type Radio
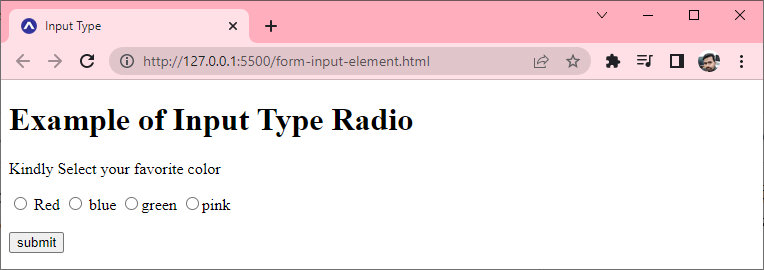
- Input Type Radio, Radio Button को Define करता है, जो Related Option के Set के बीच एक Option Choice करने की अनुमति देता है। एक समय में केवल एक Radio Button Option का Selection किया जा सकता है।
					<!DOCTYPE html>
<html lang="en">
<head>
    <title>Input Type</title>
    <link rel="icon" href="favicon.ico" type="image/x-icon">
</head>
<body>
    <h1>Example of Input Type Radio</h1>
    <form action="action_page.php" method="post">
        <p>Kindly Select your favorite color</p>
        <input type="radio" name="color" value="red"> Red
        <input type="radio" name="color" value="blue"> blue
        <input type="radio" name="color" value="green">green
        <input type="radio" name="color" value="pink">pink
        <br><br>
        <input type="submit" value="submit">
    </form>
</body>
</html>
Input Type Checkbox
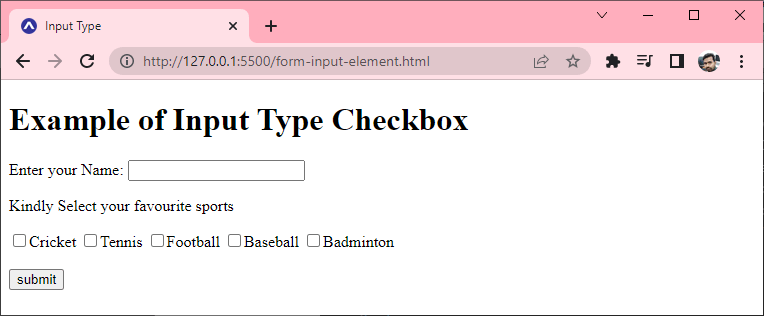
- Input Type Checkbox Square Box के रूप में Display होते हैं जिन्हें दिए गए Options में से Options को Select करने के लिए Check या Uncheck किया जा सकता है।
					<!DOCTYPE html>
<html lang="en">
<head>
    <title>Input Type</title>
    <link rel="icon" href="favicon.ico" type="image/x-icon">
</head>
<body>
    <h1>Example of Input Type Checkbox</h1>
    <form action="action_page.php" method="post">
        <label>Enter your Name:</label>
        <input type="text" name="name">
        <p>Kindly Select your favourite sports</p>
        <input type="checkbox" value="cricket">Cricket
        <input type="checkbox" value="tennis">Tennis
        <input type="checkbox" value="football">Football
        <input type="checkbox" value="baseball">Baseball
        <input type="checkbox" value="badminton">Badminton
        <br><br>
        <input type="submit" value="submit">
    </form>
</body>
</html>
Input Type Button
- Input Type Button एक Simple Push Button को Define करता है, जिसे किसी भी घटना पर कार्यात्मक रूप से Control करने के लिए Program किया जा सकता है, जैसे Click Event।
					<!DOCTYPE html>
<html lang="en">
<head>
    <title>Input Type</title>
    <link rel="icon" href="favicon.ico" type="image/x-icon">
</head>
<body>
    <h1>Example of Input Type Button</h1>
    <form action="action_page.php" method="post">
        <input type="button" value="Clcik me "
        onclick="alert('You are learning HTML Input Type')">
    </form>
</body>
</html>

Input Type File
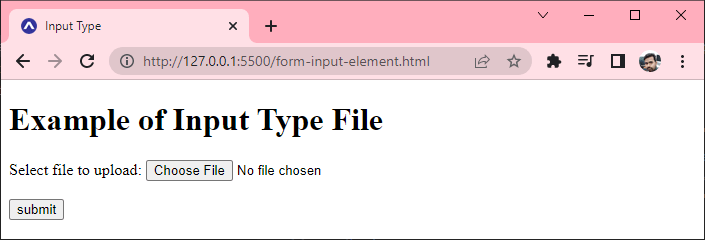
- Input Type File एक Input Field बनाता है, जो User Device Storage से एक या अधिक Files का Selection करने के लिए Use किया जाता है। एक बार जब आप File का Select कर लेते हैं, और Submit करने के बाद, इस File को JS Code और File API की मदद से Server पर Upload किया जा सकता है।
					<!DOCTYPE html>
<html lang="en">
<head>
    <title>Input Type</title>
    <link rel="icon" href="favicon.ico" type="image/x-icon">
</head>
<body>
    <h1>Example of Input Type File</h1>
    <form action="action_page.php" method="post">
        <label>Select file to upload:</label>
        <input type="file" name="newfile"><br>"><br
        <input type="submit" value="submit">
    </form>
</body>
</html>
Input Type Image
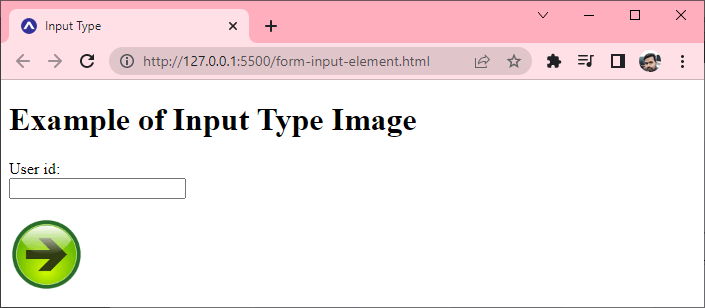
- Image के रूप में Submit Button का प्रतिनिधित्व करने के लिए Input Type Image का Use किया जाता है।
					<!DOCTYPE html>
<html lang="en">
<head>
    <title>Input Type</title>
    <link rel="icon" href="favicon.ico" type="image/x-icon">
</head>
<body>
    <h1>Example of Input Type File</h1>
    <form action="action_page.php" method="post">
        <label>User id:</label><br>
        <input type="text" name="name"><br><br>
        <input type="image" alt="Submit" src="submit.png"
        width="75px">
    </form>
</body>
</html>
Input Type Color
- Input Type Color एक Input Field को Define करने के लिए किया जाता है जिसमें एक Color होता है।
- यह User को Browser पर Visual Color Interface द्वारा Color Specify करने की अनुमति देता है।
					<!DOCTYPE html>
<html lang="en">
<head>
    <title>Input Type</title>
    <link rel="icon" href="favicon.ico" type="image/x-icon">
</head>
<body>
    <h1>Example of Input Type Color</h1>
    <form action="action_page.php" method="post">
        <p> Pick your Favorite color:</p>
        <input type="color" name="upclick" value="#a52a2a">
        <br><br>
        <input type="color" name="downclick" value="#f5f5dc">
    </form>
</body>
</html>

Input Type Date
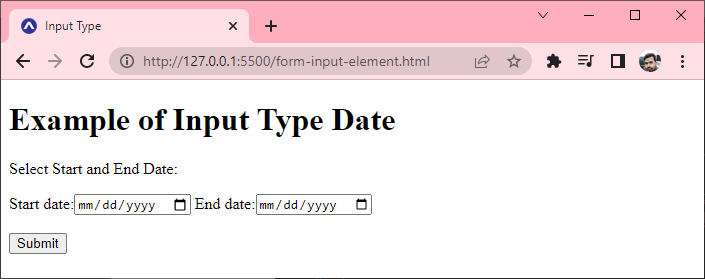
- Input Type Date एक Input Field बनाता है, जो User को किसी दिए गए Format में Date Enter करने की अनुमति देता है। User Text Field या Date Piker Interface द्वारा Date Enter कर सकता है।
					<!DOCTYPE html>
<html lang="en">
<head>
    <title>Input Type</title>
    <link rel="icon" href="favicon.ico" type="image/x-icon">
</head>
<body>
    <h1>Example of Input Type Date</h1>
    <form action="action_page.php" method="post">
        <p> Select Start and End Date:</p>
        Start date:<input type="date" name="Startdate">
        End date:<input type="date" name="Enddate"><br><br>
       <input type="submit">
    </form>
</body>
</html>
Input Type Datetime-local
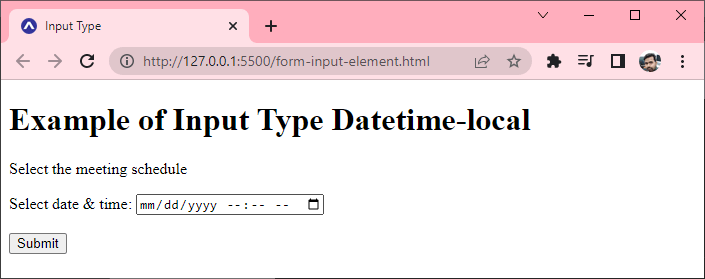
- Input Type Datetime-local एक Input Field बनाता है जो User को समय क्षेत्र की जानकारी के बिना Hours और Minute में Date के साथ-साथ स्थानीय समय का Selection करने की अनुमति देता है।
					<!DOCTYPE html>
<html lang="en">
<head>
    <title>Input Type</title>
    <link rel="icon" href="favicon.ico" type="image/x-icon">
</head>
<body>
    <h1>Example of Input Type Datetime-local</h1>
    <form action="action_page.php" method="post">
        <p>Select the meeting schedule</p>
        Select date & time:
        <input type="datetime-local" name="meetingdate">
        <br><br><input type="submit">
    </form>
</body>
</html>
Input Type Email
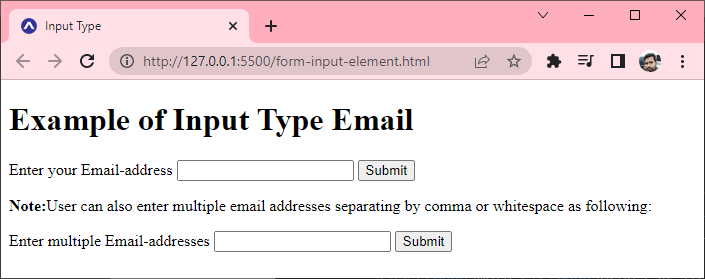
- Input Type Email एक Input Field बनाता है जो User को Pattern Validation के साथ Email Address Enter करने की अनुमति देता है। Multiple Attribute User को एक से अधिक Email Address Enter करने की अनुमति देती हैं।
					<!DOCTYPE html>
<html lang="en">
<head>
    <title>Input Type</title>
    <link rel="icon" href="favicon.ico" type="image/x-icon">
</head>
<body>
    <h1>Example of Input Type Email</h1>
    <form action="action_page.php" method="post">
        <label>Enter your Email-address</label>
        <input type="email" name="email" required>
        <input type="submit">
         <p><strong>Note:</strong>User can also enter multiple
            email addresses separating by comma or whitespace
            as following: </p>
         <label>Enter multiple Email-addresses</label>
         <input type="email" name="email"  multiple>
        <input type="submit">
    </form>
</body>
</html>
Input Type Month
- Input Type Month एक Input Field बनाता है जो User को “MM, YYYY” के Format में Month और Year को आसानी से Enter करने की अनुमति देता है, जहां MM Month के Value को Define करता है, और YYYY Year के Value को Define करता है।
					<!DOCTYPE html>
<html lang="en">
<head>
    <title>Input Type</title>
    <link rel="icon" href="favicon.ico" type="image/x-icon">
</head>
<body>
    <h1>Example of Input Type Month</h1>
    <form action="action_page.php" method="post">
        <label>Enter your Birth Month-year: </label>
        <input type="month" name="newMonth">
        <input type="submit">
    </form>
</body>
</html>

Input Type Number
- Input Type Number एक Input Field बनाता है जो User को Numeration Value Enter करने की अनुमति देती है। आप Min और Max Attribute का Use करके Minimum और Maximum Value Enter करने के लिए भी Restricted कर सकते हैं।
					<!DOCTYPE html>
<html lang="en">
<head>
    <title>Input Type</title>
    <link rel="icon" href="favicon.ico" type="image/x-icon">
</head>
<body>
    <h1>Example of Input Type Number</h1>
    <form action="action_page.php" method="post">
        <label>Enter random number: </label>
        <input type="number" name="num" min="4" max="8">
        <input type="submit">
    </form>
</body>
</html

Input Type URL
- Input Type URL एक Input Field बनाता है जो User को URL Enter करने में सक्षम बनाता है।
					<!DOCTYPE html>
<html lang="en">
<head>
    <title>Input Type</title>
    <link rel="icon" href="favicon.ico" type="image/x-icon">
</head>
<body>
    <h1>Example of Input Type URL</h1>
    <form action="action_page.php" method="post">
        <label>Enter your website URL: </label>
        <input type="url" name="website"
        placeholder="http://example.com">
        <input type="submit" value="send data">
    </form>
</body>
</html>

Input Type Week
- Input Type Week एक Input Field बनाता है जो User को समय क्षेत्र के बिना Drop-down Calendar से Week और Year का Selection करने की अनुमति देता है।
					<!DOCTYPE html>
<html lang="en">
<head>
    <title>Input Type</title>
    <link rel="icon" href="favicon.ico" type="image/x-icon">
</head>
<body>
    <h1>Example of Input Type Week</h1>
    <form action="action_page.php" method="post">
        <label>Select your best week of year:</label>
        <input type="week" name="bestweek">
        <input type="submit" value="Send data">
    </form>
</body>
</html>

Input Type Search
- Input Type Search एक Input File बनाता है जो User को एक Search String Enter करने की अनुमति देता है।
					<!DOCTYPE html>
<html lang="en">
<head>
    <title>Input Type</title>
    <link rel="icon" href="favicon.ico" type="image/x-icon">
</head>
<body>
    <h1>Example of Input Type Search</h1>
    <form action="action_page.php" method="post">
        <label>Search here:</label>
        <input type="search" name="search">
        <input type="submit" value="search">
    </form>
</body>
</html>

Input Type Tel
- Input Type Tel Telephone Number Enter करने के लिए Input Field बनाता है।
- Tel Type में Email जैसे Default Validation नहीं होता है, क्योंकि Telephone Number Pattern दुनिया भर में भिन्न हो सकता है।
					<!DOCTYPE html>
<html lang="en">
<head>
    <title>Input Type</title>
    <link rel="icon" href="favicon.ico" type="image/x-icon">
</head>
<body>
    <h1>Example of Input Type Tel</h1>
    <form action="action_page.php" method="post">
        <label>Enter your Telephone Number:</label>
        <input type="tel" name="telephone" required>
        <input type="submit">
    </form>
</body>
</html>

Attributes of Input Element
Value Attribute
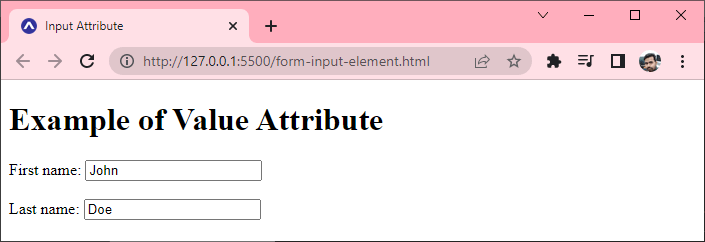
- Input Value Attribute Input Field के लिए Primary Value को Specify करती है।
					<!DOCTYPE html>
<html lang="en">
<head>
    <title>Input Attribute</title>
    <link rel="icon" href="favicon.ico" type="image/x-icon">
</head>
<body>
    <h1>Example of Value Attribute</h1>
    <form action="action_page.php" method="post">
        <label for="fname">First name:</label>
        <input type="text" name="fname" value="John"><br><br>
        <label for="lname">Last name:</label>
        <input type="text" name="lname" value="Doe">
    </form>
</body>
</html>
Readonly Attribute
- Input Readonly Attribute Specify करती है कि यह Input Field Only Read करने के लिए है।
- Readonly के लिए Input Field को Modifies नहीं किया जा सकता है (हालांकि, User इसे Tab कर सकता है, इसे Highlight कर सकता है और इससे Text Copy कर सकता है)।
- Form Submit करते समय Readonly Input Field का Value भेजा जाएगा!
					<!DOCTYPE html>
<html lang="en">
<head>
    <title>Input Attribute</title>
    <link rel="icon" href="favicon.ico" type="image/x-icon">
</head>
<body>
    <h1>Example of Readonly Attribute</h1>
    <form action="action_page.php" method="post">
        <label for="fname">Website name:</label>
        <input type="text" name="fname" value="Aiyoit" readonly>
    </form>
</body>
</html>

Placeholder Attribute
- Input Placeholder Attribute एक Short Hint Specify करती है जो Input Field के Excepted Value (Sample Value या Excepted Format का Short Description) को Describe करता है।
- Placeholder Attribute निम्नलिखित Input Types के साथ Work करती है: Text, Search, URL, Tel, Email और Password।
					<!DOCTYPE html>
<html lang="en">
<head>
    <title>Input Attribute</title>
    <link rel="icon" href="favicon.ico" type="image/x-icon">
</head>
<body>
    <h1>Example of Placeholder Attribute</h1>
    <form action="action_page.php" method="post">
        <label for="phone">Enter a phone number:</label>
        <input type="tel" placeholder="123-45-678"
        name="phone" pattern="[0-9]{3}-[0-9]{2}-[0-9]{3}">
    </form>
</body>
</html>

Pattern Attribute
- Input Pattern Attribute एक Regular Expression specify करती है कि Form Submit होने पर Input Field का Value Check किया जाता है।
- Pattern Attribute निम्नलिखित Input Types के साथ Work करती है: Text, Date, Search, URL, Tel, Email और Password।
					<!DOCTYPE html>
<html lang="en">
<head>
    <title>Input Attribute</title>
    <link rel="icon" href="favicon.ico" type="image/x-icon">
</head>
<body>
    <h1>Example of Pattern Attribute</h1>
    <form action="action_page.php" method="post">
        <label for="phone">Enter a phone number:</label>
        <input type="tel" placeholder="123-45-678"
        name="phone" pattern="[0-9]{3}-[0-9]{2}-[0-9]{3}">
    </form>
</body>
</html>

Size Attribute
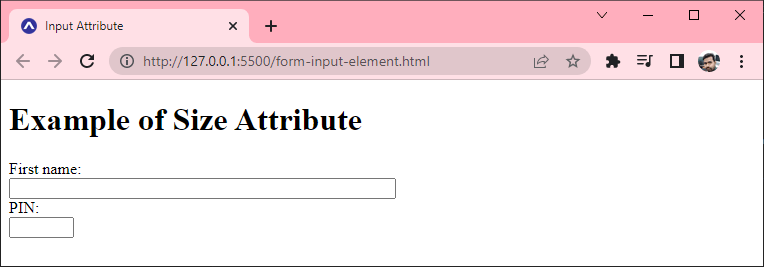
- Input Size Attribute एक Input Field की दृश्य width, Characters में Specifies करती है। Size के लिए Default Value 20 है।
- Size Attribute निम्नलिखित Input Types के साथ Work करती है: Text, Search, Tel, URL, Email और Password।
					<!DOCTYPE html>
<html lang="en">
<head>
    <title>Input Attribute</title>
    <link rel="icon" href="favicon.ico" type="image/x-icon">
</head>
<body>
    <h1>Example of Size Attribute</h1>
    <form action="action_page.php" method="post">
        <label for="fname">First name:</label><br>
        <input type="text" name="fname" size="50"><br>
        <label for="pin">PIN:</label><br>
        <input type="text" name="pin" size="4">
    </form>
</body>
</html>
Maxlenght Attribute
- Input Maxlength Attribute Input Field में Allow Character की Maximum Number को Specifies करती है।
					<!DOCTYPE html>
<html lang="en">
<head>
    <title>Input Attribute</title>
    <link rel="icon" href="favicon.ico" type="image/x-icon">
</head>
<body>
    <h1>Example of Maxlength Attribute</h1>
    <form action="action_page.php" method="post">
        <label for="fname">First name:</label><br>
        <input type="text" name="fname" size="50"><br>
        <label for="pin">PIN:</label><br>
        <input type="text" name="pin" maxlength="4" size="4">
    </form>
</body>
</html>
Min and Max Attributes
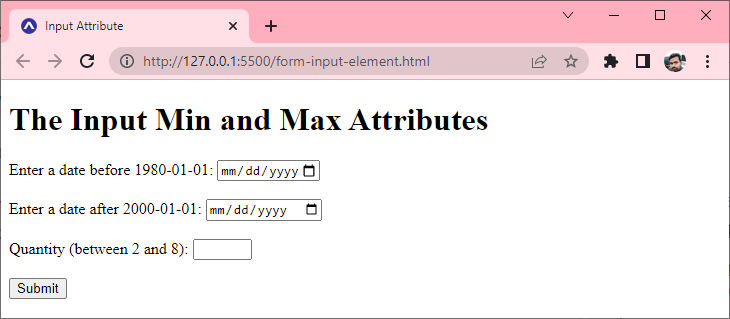
- Input Min और Max Attribute Input Field के लिए Minimum और Maximum Value को Specified करते हैं।
- Minimum और Maximum Attribute निम्नलिखित Input Types के साथ Work करती हैं: Number, Range, Date, Datetime-local, Month, Time और Week।
					<!DOCTYPE html>
<html lang="en">
  <head>
    <title>Input Attribute</title>
    <link rel="icon" href="favicon.ico" type="image/x-icon" />
  </head>
  <body>
    <h1>The Input Min and Max Attributes</h1>
    <form action="action_page.php">
      <label for="datemax">Enter a date before
        1980-01-01:</label>
      <input type="date" name="datemax" max="1979-12-31"/>
      <br /><br />
      <label for="datemin">Enter a date after
        2000-01-01:</label>
      <input type="date" name="datemin" min="2000-01-02"/>
      <br /><br />
      <label for="quantity">Quantity (between
        2 and 8):</label>
      <input type="number" name="quantity" min="2"max="8"/>
      <br /><br />
      <input type="submit" value="Submit" />
    </form>
  </body>
</html>
Multiple Attribute
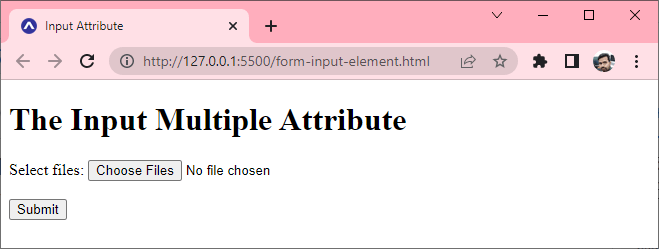
- Input Multiple Attribute Specified करती है कि User को Input Field में एक से अधिक Value Enter करने की अनुमति है।
- Multiple Attribute निम्न Input Types के साथ Work करती है: Email और File।
					<!DOCTYPE html>
<html lang="en">
  <head>
    <title>Input Attribute</title>
    <link rel="icon" href="favicon.ico" type="image/x-icon" />
  </head>
  <body>
    <h1>The Input Multiple Attribute</h1>
    <form action="action_page.php">
      <label for="files">Select files:</label>
      <input type="file" name="files" multiple>
      <br><br>
      <input type="submit" value="Submit">
    </form>
  </body>
</html>
Require Attribute
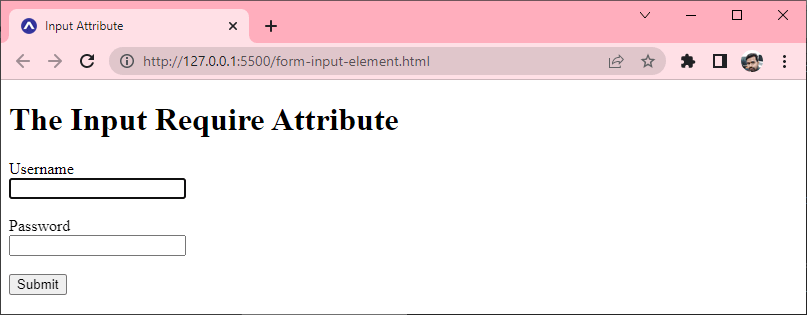
- Input Require Attribute Specified करती है कि Form Submit करने से पहले यह Input Field भरना आवश्यक है।
- Require Attribute निम्नलिखित Input Types के साथ Work करती है: Text, Search, URL, Tel, Email, Password, Date-piker, Number, Checkbox, Radio और File।
					<!DOCTYPE html>
<html lang="en">
  <head>
    <title>Input Attribute</title>
    <link rel="icon" href="favicon.ico" type="image/x-icon" />
  </head>
  <body>
    <h1>The Input Require Attribute</h1>
    <form action="/action_page.php">
       <label for="username">Username</label><br>
       <input type="text" name="username" required>
       <br><br>
       <label for="pass">Password</label><br>
       <input type="text" name="pass" required>
       <br><br>
       <input type="submit" value="Submit">
     </form>
 </body
</html>
Facebook
Pinterest
LinkedIn
WhatsApp


