
What is Other Form Elements?
Input Field के अलावा, HTML Form में Working Capacityऔर Users अनुभव को बढ़ाने के लिए Other Element शामिल हो सकते हैं। यहां कुछ सामान्य Element दिए गए हैं जिनका उपयोग HTML Form के साथ Combination किया जा सकता है
Label Element
- Label Form में होना बेहतर माना जाता है। चूंकि यह Code Parser/Browser/Users को Friendly बनाता है।
- <label> Element कई प्रकार के Elements के लिए एक Label को Define करता है।
- <label> Tag की For Attribute उन्हें एक साथ बाँधने के लिए <input> Element की Name Attribute के बराबर होना चाहिए।
					<!DOCTYPE html>
<html lang="en">
  <head>
    <title>Label Element</title>
    <link rel="icon" href="favicon.ico" type="image/x-icon" />
  </head>
  <body>
      <form action="/action_page.php">
        <label for="username">Username</label><br>
        <input type="text" name="username" required>
        <br><br>
        <input type="submit" value="Submit">
      </form>
  </body>
</html>
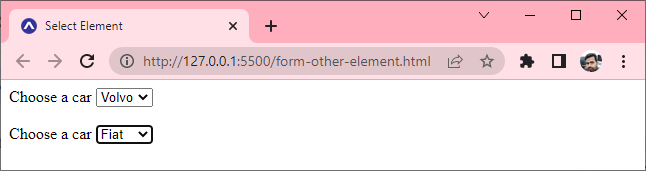
Select and Option Element
- <select> Element Drop-down List को Define करता है।
- <option> Element एक option को Define करता है जिसे Select किया जा सकता है।
- Default रूप से, Drop-down List में पहला Item Select हो जाता है।
- Pre-selection Option को Define करने के लिए, Selected Attribute को Option में Add कर देते है ।
					<!DOCTYPE html>
<html lang="en">
  <head>
    <title>Select Element</title>
    <link rel="icon" href="favicon.ico" type="image/x-icon" />
  </head>
  <body>
      <form action="/action_page.php">
        <label for="cars">Choose a car</label>
        <select name="cars">
          <option value="volvo">Volvo</option>
          <option value="saab">Saab</option>
          <option value="fiat">Fiat</option>
          <option value="audi">Audi</option>
        </select>
        <br><br>
        <label for="cars">Choose a car</label>
        <select name="cars">
          <option value="volvo">Volvo</option>
          <option value="saab">Saab</option>
          <option value="fiat" selected>Fiat</option>
          <option value="audi">Audi</option>
        </select>
        <br><br>
      </form>
  </body>
</html>
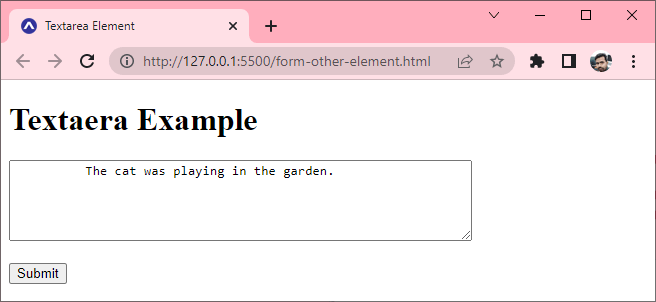
Textarea Element
- <textarea> Element एक Multi-line Input Field (Text area) को Define करता है।
- Row Attribute Text area में Lines की Visible Number को Specified करती है।
- Cols Attribute Text Area की Visible Width को Specified करती है।
					<!DOCTYPE html>
<html lang="en">
  <head>
    <title>Textarea Element</title>
    <link rel="icon" href="favicon.ico" type="image/x-icon" />
  </head>
  <body>
      <h1>Textaera Example</h1>
      <form action="/action_page.php">
        <textarea name="message" rows="5" cols="60">
          The cat was playing in the garden.</textarea>
        <br><br>
        <input type="submit">
      </form>
  </body>
</html>
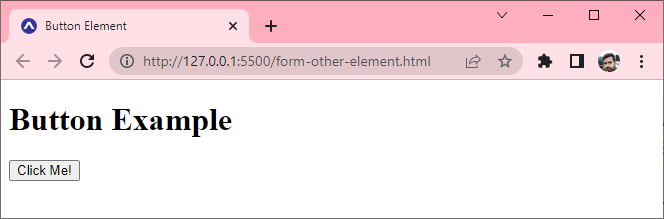
Button Element
- <button> Element एक Click करने योग्य Button को Define करता है।
					<!DOCTYPE html>
<html lang="en">
  <head>
    <title>Button Element</title>
    <link rel="icon" href="favicon.ico" type="image/x-icon" />
  </head>
  <body>
      <h1>Button Example</h1>
      <button type="button" onclick="alert('Hello World!')">
        Click Me!</button>
  </body>
</html>
Fieldset and Legend Element
- <fieldset> Element का उपयोग किसी Form में Related Data को Group करने के लिए किया जाता है।
- <legend> Element <fieldset> Element के लिए एक Caption को Define करता है।
					<!DOCTYPE html>
<html lang="en">
  <head>
    <title>Fieldset and Legend Element</title>
    <link rel="icon" href="favicon.ico" type="image/x-icon" />
  </head>
  <body>
      <h1>Fieldset and Legend Example</h1>
      <form action="/action_page.php">
        <fieldset>
          <legend>Personalia:</legend>
          <label for="fname">First name:</label><br>
          <input type="text" name="fname" value="John"><br>
          <label for="lname">Last name:</label><br>
          <input type="text" name="lname" value="Sharma"><br>
          <br><input type="submit" value="Submit">
        </fieldset>
      </form>
  </body>
</html>

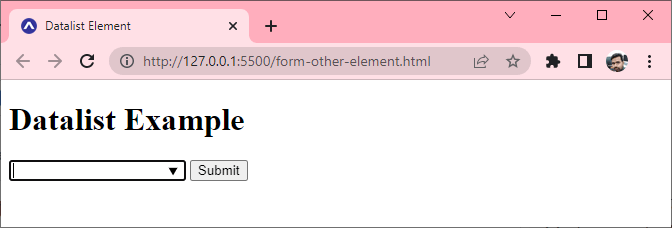
Datalist Element
- <datalist>Element <input> Element के लिए Pre-define Options की एक List को Specified करता है।
- Users Data Input करते ही Pre-define Options की एक Drop-down List देखेंगे।
- <input> Element की List Attribute, <datalist> Element की Id Attribute को Refer करनी चाहिए।
					<!DOCTYPE html>
<html lang="en">
  <head>
    <title>Datalist Element</title>
    <link rel="icon" href="favicon.ico" type="image/x-icon" />
  </head>
  <body>
      <h1>Datalist Example</h1>
      <form action="/action_page.php">
        <input list="browsers" name="browser">
        <datalist id="browsers">
          <option value="Internet Explorer">
          <option value="Firefox">
          <option value="Chrome">
          <option value="Opera">
          <option value="Safari">
        </datalist>
        <input type="submit">
      </form>
  </body>
</html>
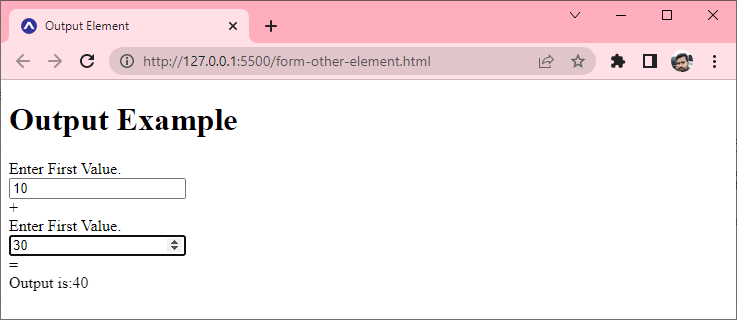
Output Element
- <output> Element एक Calculation के Result को Represent करता है (जैसे एक Script द्वारा किया गया)।
					<!DOCTYPE html>
<html lang="en">
  <head>
    <title>Output Element</title>
    <link rel="icon" href="favicon.ico" type="image/x-icon" />
  </head>
  <body>
      <h1>Output Example</h1>
      <form
      oninput="res.value=parseInt(a.value)+parseInt(b.value);">
        <label>Enter First Value.</label><br>
        <input type="number" name="a" value=""/><br>
        +<br/>
        <label>Enter First Value.</label><br>
        <input type="number" name="b" value=""><br>
        =<br>
        Output is:<output name="res"></output>
     </form>
  </body>
</html>
Optgroup Element
- <optgroup> Element का उपयोग <option> को <select > Element के भीतर एक Drop-down List में Grouping करने के लिए किया जाता है।
- <optgroup> Element का उपयोग <select> के साथ Drop-down List तक पहुंचना आसान बनाता है, खासकर यदि सूची में बड़ी संख्या में Option हैं।
					<html lang="en">
  <head>
    <title>Optgroup Element</title>
    <link rel="icon" href="favicon.ico" type="image/x-icon" />
  </head>
  <body>
    <h1>Optgroup Example</h1>
    <form>
      <label>Select your favourite brand</label><br />
      <select>
        <optgroup label="Laptop Maufacturur">
          <option value="dell">Dell</option>
          <option value="hp">HP</option>
          <option value="lenovo">Lenovo</option>
          <option value="acer">Acer</option>
        </optgroup>
        <optgroup label="Mobile Manufacturer">
          <option value="apple">Apple</option>
          <option value="nokia">Nokia</option>
          <option value="samsung">Samsung</option>
          <option value="coolpad">Coolpad</option>
        </optgroup>
      </select>
    </form>
  </body>
</html>
Facebook
Pinterest
LinkedIn
WhatsApp
